Servo motor top ten fault analysis
Three-phase AC servo motors are widely used, but after long-term operation, various faults will occur. Timely identification of the cause of the fault and corresponding treatment are important tasks to prevent the expansion of the fault and ensure the normal operation of the equipment.
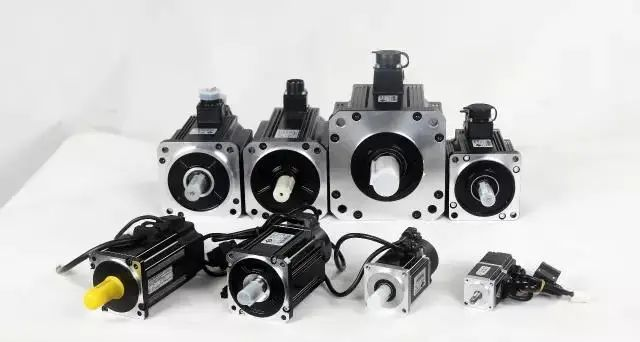
Motor encoder alarm
1. Cause of failure
① Wiring error;
②Electromagnetic interference;
③Encoder hardware damage caused by mechanical vibration;
④ Pollution caused by the on-site environment;
2. Troubleshooting
① Check the wiring and eliminate errors;
② Check whether the shielding is in place, check whether the wiring is reasonable and solve it, and add filters to improve it if necessary;
③ Check the mechanical structure and make improvements;
④ Check whether the encoder is contaminated or corroded (dust, oil, etc.) and strengthen protection;
3. Installation and wiring standards
①Try to use original cables;
②Separate the cables and keep them as far away from polluted wiring as possible, especially highly polluted wiring;
③Always use the internal power supply as much as possible. If a switching power supply is used, a filter should be used to ensure that the power supply reaches the clean level;
④Always ground the common terminal;
⑤Insulate the encoder housing from the machine structure and connect it to the cable shield;
⑥ If it is not possible to insulate the encoder, the cable shield can be connected to the ground (or dedicated terminal) on the encoder housing and the drive frame.
Motor shaft broken
1. Cause of failure
①Irrational mechanical design leads to excessive radial load;
②The load end is stuck or severely overloaded;
③The motor and reducer are not concentric during assembly.
2. Troubleshooting
① Check the maximum radial load force that the motor can withstand in the sample and improve the mechanical design;
② Check the operation of the load end, confirm the actual process requirements and make improvements;
③ Check whether the load is running stably and whether there is vibration, and improve the mechanical assembly accuracy.
The motor no-load current is unbalanced and the three-phase difference is large
1. Cause of failure
① The first and last ends of the winding are connected incorrectly;
②The power supply voltage is unbalanced;
③ The winding has faults such as inter-turn short circuit and coil reverse connection.
2. Troubleshooting
① Check and correct;
②Measure the power supply voltage and try to eliminate the imbalance;
③Eliminate winding fault.
The motor makes abnormal noise when running.
1. Cause of failure
① The bearing is worn or there are sand or other foreign matter in the oil;
②The rotor core is loose;
③The bearing lacks oil;
④The power supply voltage is too high or unbalanced.
2. Troubleshooting
①Replace or clean the bearing;
②Inspect the rotor core;
③Come on;
④Check and adjust the power supply voltage
The motor is difficult to start. When the motor is under rated load, the speed is much lower than the rated speed.
1. Cause of failure
①The power supply voltage is too low;
② The motor is connected incorrectly by face connection;
③The rotor is welded or broken;
④ The local coil of the rotor is connected incorrectly or reversely;
③ When repairing the motor winding, the number of turns is increased too much;
⑤The motor is overloaded.
2. Troubleshooting
①Measure the power supply voltage and try to improve it;
②Correct the connection method;
③ Check for open welds and breakpoints and repair them;
④ Find out the misconnection and correct it;
⑤Restore the correct number of turns;
⑥ Reduce load.
The motor cannot rotate after power is turned on, but there is no abnormal sound, odor or smoke?
1. Cause of failure
①The power supply is not connected (at least two phases are not connected);
② The fuse is blown (at least two phases are blown);
③The overcurrent relay is adjusted too low;
④The control device wiring is incorrect.
2. Troubleshooting
① Check the power circuit switch, fuse, and junction box for breakpoints and repair them;
② Check the fuse model and the cause of the fuse, and replace it with a new one;
③ Adjust the relay setting value to match the motor;
④Correct the wiring.
The motor vibrates violently during operation
1. Cause of failure
① Due to excessive bearing clearance caused by wear;
②The air gap is uneven;
③The rotor is unbalanced;
④The shaft is bent;
⑤The coaxiality of the coupling (pulley) is too low.
2. Troubleshooting
①Inspect the bearings and replace if necessary;
②Adjust the air gap to make it uniform;
③Correct the dynamic balance of the rotor;
④Align the rotating shaft;
⑤ Recalibrate to meet the requirements.
After power on, the motor does not rotate and there is a buzzing sound
1. Cause of failure
①The rotor winding is broken (one phase is disconnected) or one phase of the power supply is lost;
② The lead wires of the winding are connected incorrectly at the beginning and end or the winding is connected reversely;
③The power circuit contacts are loose and the contact resistance is large;
④The motor load is too large or the rotor is stuck;
⑤The power supply voltage is too low;
⑥The small motor is assembled too tightly or the grease in the bearing is too hard;
⑦The bearing is stuck.
2. Troubleshooting
① Identify the breakpoints and repair them;
② Check the polarity of the winding and determine whether the winding end is correct;
③ Tighten the loosened connection screws, use a multimeter to determine whether the joints are falsely connected, and repair them;
④ Reduce load or find out and eliminate mechanical faults;
⑤ Check whether the prescribed surface connection method is connected incorrectly; whether the voltage drop is too large due to the power supply wire being too thin, and correct it;
⑥ Reassemble to make it flexible; replace with qualified grease;
⑦Repair the bearings.
Bearing overheating?
1. Cause of failure
① Too much or too little grease;
②The oil quality is poor and contains impurities;
③ The bearing and the journal or end cover do not fit properly (too loose or too tight);
④The inner hole of the bearing is eccentric and rubs against the shaft;
⑤The motor end cover or bearing cover is not installed flat;
⑥The coupling between the motor and the load is not calibrated, or the belt is too tight;
⑦ The bearing clearance is too large or too small;
⑧The motor shaft is bent.
2. Troubleshooting
①Add grease as required (1/3-2/3 of the volume);
②Replace clean lubricating grease;
③ If it is too loose, it can be repaired with adhesive. If it is too tight, it should be turned or the inner hole of the journal or end cover should be ground to make it fit;
④Repair the bearing cover and eliminate the friction points;
⑤Reassemble;
⑥Recalibrate and adjust the belt tension;
⑦Replace new bearings;
⑧Correct the motor shaft or replace the rotor.
The motor is overheating or even smoking?
1. Cause of failure
①The power supply voltage is too high;
②The power supply voltage is too low, the motor is running with rated load, and the current is too large, causing the winding to heat up;
③ When repairing and removing the winding, improper thermal removal method is used, which burns the iron core;
④The motor is overloaded or started frequently;
⑤The motor is missing a phase and runs in two phases;
⑥ The winding is not fully dipped in varnish after rewinding;
⑦ The ambient temperature is high, there is a lot of dirt on the surface of the motor, or the ventilation duct is blocked.
2. Troubleshooting
① Reduce the power supply voltage (such as adjusting the power supply transformer tap);
②Increase the power supply voltage or thicken the power supply wire;
③Inspect the iron core and eliminate the fault;
④ Reduce load; control starting according to the specified number of times;
⑤Restore three-phase operation;
⑥ Use secondary dipping and vacuum dipping process;
⑦ Clean the motor, improve the ambient temperature, and adopt cooling measures.





 XINDA
XINDA